몰땐ENOUGH
Modsecurity(웹 방화벽 오픈 소스) nginx에 패치하기 (wls2_ubuntu 환경) - 1 (2024.12.16) 본문
Modsecurity(웹 방화벽 오픈 소스) nginx에 패치하기 (wls2_ubuntu 환경) - 1 (2024.12.16)
몰댄이너푸 2024. 12. 11. 17:51우선 해당 글은, wls2 ubuntu 환경에서 진행한다.
따라가는 방식은 modsecurity 깃 소스의 Reference 문서를 참조한다.
Reference Manual (v3.x)
ModSecurity is an open source, cross platform web application firewall (WAF) engine for Apache, IIS and Nginx. It has a robust event-based programming language which provides protection from a rang...
github.com
nginx는 깔려있어야한다.
nginx 설치법 :
wget http://nginx.org/download/nginx-1.24.0.tar.gz  # 최신 버전 확인 필요
tar -xzvf nginx-1.24.0.tar.gz
cd nginx-1.24.0
한줄 한줄 따라가보자.
The first step in obtaining nginx server with built-in ModSecurity module is building of standalone library containing full ModSecurity with a set of intermediate APIs (this layer is a common base for IIS version, nginx version, and server-less command line version of ModSecurity).
ModSecurity는 단순한 NGINX 모듈이 아니라, 다양한 플랫폼과 웹 서버(IIS, Apache, NGINX 등)에서 작동할 수 있는 독립적인 보안 라이브러리이기에, 공통 API들을 사용하기 위해서 standalone library 다운로드하고 빌드해야한다고 한다.
To build the standalone module from source on a GNU/Linux platform, you need to install the standard and development packages for apache and prce.
modsecurity를 빌드할 때 필요한 페키지를 깔아주어야한다.
해당 패키지들은...
아파치 관련 패키지와 pcre(정규 표현식 처리)관련한 패키지들이 있다..
이때, 왜 nginx에 modsecurity를 패치하고 싶은건데, 아파치 관련 패키지를 빌드하고 싶은지 의문을 가질 수도 있는데..
modsecurity 이슈 603번에 보면 답변이 달려있다.
https://github.com/owasp-modsecurity/ModSecurity/issues/603
nginx build requires apache, it shouldn't. #603

ModSecurity가 처음 개발되었을 때 Apache 웹 서버와 함께 작동하도록 설계되었기 때문에, 공통 모듈로 분리해서 다른 서버에서도 사용하려면 APR이 여전히 필요하게 된거다... ( 리팩토링의 부족이랄까..?_)
무튼 이제 설치한다.
문서에 나와 있는 것 처럼, 시도
(1) Preinstallation Steps
아파치 관련 패키지 ( apache2-threaded ) / XML 문서 파싱,처리 패키지( libxml2-dev ) 다운로드
추가로 c/c++ 개발을 위한 기본 빌드 도구 패키지( build-essential ) 정규표현식을 처리하기 위한 ( libpcre3-dev ) 패키지 도 다운로드
# Debian style install
apt-get install apache2-threaded-dev libxml2-dev build-essential libpcre3-dev
바로 FAIL . ..
apt-get install apache2-threaded-dev libxml2-dev
Reading package lists... Done
Building dependency tree... Done
Reading state information... Done


E: Unable to locate package apache2-threaded-dev
>>> E: Unable to locate package apache2-threaded-dev
해당 페키지 못찾음요..,,
찾아보니 2024.12.11 현시점 기준
패키지 이름이 apache2-threaded-dev 에서 apache2-dev 로 바뀜...
다시..도전
sudo apt install apache2-dev libxml2-dev build-essential libpcre3-dev
그럼 설치가 완료된다.
(2) ModSecurity (libmodsecurity) 다운로드 및 빌드
modsecurity 소스 다운
Note that the path and name of the mod_security folder will differ based on what version and where you download the tarball from modsecurity.org
이제 소스를 다운받아보자. The standalone ModSecurity is located at https://www.modsecurity.org/download.html.
라고 메뉴얼에 가면 나와있어서, 다운받으러 가본다...
페이지가 없다....?

그래서 그냥 깃허브가서 다운받는다..
git clone https://github.com/SpiderLabs/ModSecurity.git
cd ModSecurity
ls

그 다음 buil process를 진행해준다.
$ ./build.sh
$ ./configure
$ make
$ sudo make install
./configure 을 하면,

해당 에러가 발생하는데,
제시된 것처럼 git submodule init / git submodule update 해준다. ( libInjection은 ModSecurity에서 사용하는 외부 라이브러리인데, 별도로 관리되고 있다고한다... )
git submodule init
git submodule update
이제 다시 설정파일을 실행해준다.
./configure
(2) building the nginx server with the modsecurity
ModSecurity Nginx 커넥터를 다운로드
Nginx를 ModSecurity와 함께 빌드
이제 ModSecurity Nginx 커넥터를 다운로드 해준다.
git clone --depth 1 https://github.com/SpiderLabs/ModSecurity-nginx.git
nginx configure에 Modsecurity-nginx 커넥터 추가해준다.
cd ~/nginx-1.24.0


./configure --with-compat \
--add-dynamic-module=/home/me/ModSecurity-nginx \
--with-http_ssl_module \
--with-cc-opt="-I/usr/local/modsecurity/include" \
--with-ld-opt="-L/usr/local/modsecurity/lib" \
--prefix=/usr/local/nginx \
--with-pcre-jit \
--with-http_v2_module \
--with-http_stub_status_module


make
sudo make install
🤷♀️./configure 명령어는 NGINX를 설정할 때 여러 옵션을 지정하여 NGINX가 필요한 기능을 포함하도록 하는데,
1. --with-compat
- 목적: 이 옵션은 NGINX가 동적 모듈과 함께 호환되도록 설정
- 설명: --with-compat은 NGINX가 정적 및 동적 모듈을 함께 사용할 수 있도록 호환성 모드를 활성화. 이 옵션을 사용하지 않으면 동적 모듈을 사용할 수 없음. ModSecurity와 같은 동적 모듈을 추가하기 위해 필요한 옵션임
2. --add-dynamic-module=/home/me/ModSecurity-nginx
- 목적: NGINX에 동적 모듈을 추가하는 옵션
- 설명: --add-dynamic-module 옵션은 NGINX에 외부 동적 모듈을 추가하는데 사용. /home/me/ModSecurity-nginx 경로에 있는 nginx-modsecurity 커넥터를 동적 모듈로 추가
3. --with-http_ssl_module
- 목적: SSL을 지원하는 NGINX 서버 모듈을 활성화
- 설명: --with-http_ssl_module 옵션을 사용하면 NGINX가 HTTPS를 지원할 수 있도록 SSL 모듈을 포함시킴
4. --with-cc-opt="-I/usr/local/modsecurity/include"
- 목적: 컴파일러에 ModSecurity 헤더 파일을 찾을 수 있는 경로를 제공하는 옵션
- 설명: 이 옵션은 ModSecurity의 헤더 파일들이 있는 경로를 컴파일러에 알려줌. /usr/local/modsecurity/include 경로에 ModSecurity 헤더 파일이 위치한다는 것을 지정함
5. --with-ld-opt="-L/usr/local/modsecurity/lib"
- 목적: 링커에 ModSecurity 라이브러리를 찾을 수 있는 경로를 제공하는 옵션
- 설명: 이 옵션은 링커에게 ModSecurity 라이브러리 파일들이 위치한 경로를 알려줌
/usr/local/modsecurity/lib 경로에 ModSecurity의 라이브러리 파일이 있음.
6. --prefix=/usr/local/nginx
- 목적: NGINX를 설치할 경로를 지정하는 옵션
- 설명: --prefix=/usr/local/nginx 옵션은 NGINX가 설치될 경로를 지정
이 경로는 NGINX의 실행 파일, 라이브러리, 설정 파일 등이 설치될 디렉토리입니다.
7. --with-pcre-jit
- 목적: PCRE (Perl Compatible Regular Expressions) 모듈에 대한 JIT (Just-In-Time) 컴파일을 활성화하는 옵션
- 설명: --with-pcre-jit 옵션은 PCRE 라이브러리에서 JIT 컴파일을 활성화하여 정규 표현식 성능을 최적화함
8. --with-http_v2_module
- 목적: HTTP/2 프로토콜을 지원하는 모듈을 활성화하는 옵션
- 설명: --with-http_v2_module 옵션을 사용하면 NGINX에서 HTTP/2 프로토콜을 사용할 수 있도록 함
9. --with-http_stub_status_module
- 목적: NGINX의 상태 페이지를 제공하는 모듈을 활성화하는 옵션
- 설명: --with-http_stub_status_module 옵션은 NGINX 서버의 상태 정보를 조회할 수 있는 /status 페이지를 제공함
그러면 Nginx가 /usr/local/nginx에 설치된다..
확인해보자~
/usr/local/nginx/sbin/nginx -v
이제 Nginx 설정 파일 수정을 해보자.
Nginx가 설치된 경로의 conf 파일을 열어준다. (/usr/local/nginx)
sudo nano /usr/local/nginx/conf/nginx.conf
load_module /usr/local/modsecurity/lib/libmodsecurity.so;이렇게 하면 에러가 뜬다.
dlopen() "/usr/local/nginx/modules/ngx_http_modsecurity_module.so" failed (libmodsecurity.so.3: cannot open shared object file: No such file or directory) in /usr/local/nginx/conf/nginx.conf:11
그래서, 일단은 해당 라이브러리가 존재하는지 확인..,,

존재하고 있었다. 그래서 찾아보니..
동적 환경 변수 설정을 해줘야한다..( LD_LIBRARY_PATH는 리눅스 및 유닉스 계열 시스템에서 동적 라이브러리의 경로를 설정하는 환경 변수 )
env LD_LIBRARY_PATH=/home/me/ModSecurity/src/.libs:$LD_LIBRARY_PATH;
load_module /usr/local/nginx/modules/ngx_http_modsecurity_module.so;
(4) ModSecurity 설정 파일 구성
modsecurity 설정 내용 추가해보기
sudo nano /usr/local/nginx/conf/modsecurity.conf이제 modsecurity 설정을 해보자.
# ModSecurity 기본 설정
SecRuleEngine On
SecRequestBodyAccess On
SecResponseBodyAccess Off
SecRule REQUEST_HEADERS:User-Agent "BadBot" \
    "id:1234,deny,status:403,msg:'BadBot is not allowed'"


include /usr/local/nginx/conf/modsecurity.conf;
modsecurity.conf 파일을 만들어주고, 이제 다시 nginx.conf에 패치해준다.
http 블록에 추가하면
- 서버 전체에 대해 ModSecurity를 활성화되고
server 블록에 추가하는 방법:
- 특정 서버(도메인)에 대해서만 ModSecurity를 활성화되고
location 블록에 추가하는 방법:
- 특정 경로에 대해서만 ModSecurity를 활성화된다.
일단 나는 location 내부에 패치해주었다.
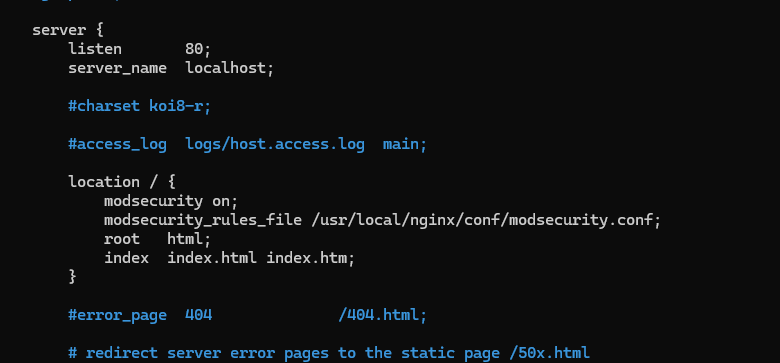
이제 test 해보면,
[emerg] "modsecurity_rules_file" directive Rule id: 1234 is duplicated
 in /usr/local/nginx/conf/nginx.conf:46
nginx: configuration file /usr/local/nginx/conf/nginx.conf test failed
test fail이 뜨는데, 내가 설정한 rule이 중복되었다고 한다..
modsecurity.conf 파일을 다시 열어서,중복되는 규칙 아이디를 수정해준다.
# ModSecurity 기본 설정
SecRuleEngine On
SecRequestBodyAccess On
SecResponseBodyAccess Off
SecRule ARGS|REQUEST_HEADERS|XML:/* "@rx <script>" "id:1234,phase:2,deny,status:403"
# 위 규칙을 수정해서 id를 변경
SecRule ARGS|REQUEST_HEADERS|XML:/* "@rx <script>" "id:1235,phase:2,deny,status:403"
이제 다시 test
sudo /usr/local/nginx/sbin/nginx -t
성공..,!!!!
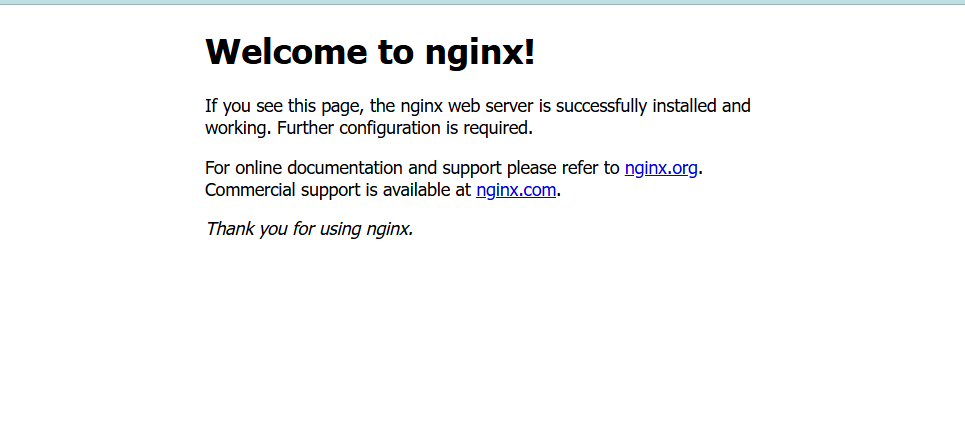
sudo /usr/local/nginx/sbin/nginx
curl http://localhost